Knowing how to install a rot board on fence is one of the best ways to protect it from moisture and decay. No matter if you have a wooden fence or any other type that is prone to water damage, a rot board can help prolong its life.
This article will guide you on how to install a rot board on a fence, step by step, and explain why it’s a smart choice for your property.

What is a Rot Board?
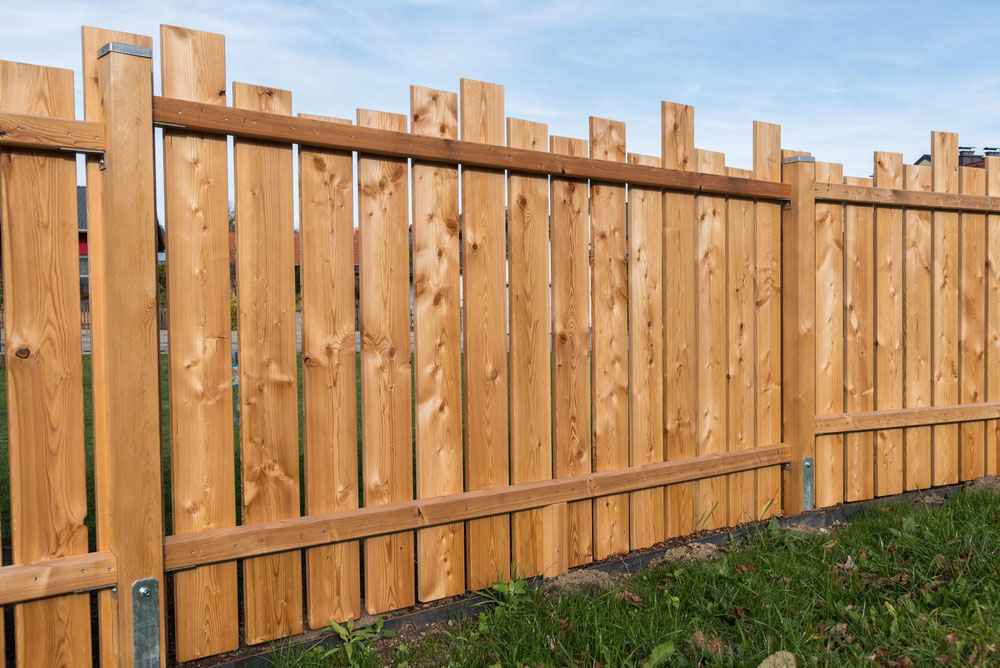
A rot board is a protective barrier attached to the bottom of a fence. It prevents the wood from coming into direct contact with the ground, where moisture and soil can cause rot over time.
Installing a rot board, you create a protective layer that keeps your fence looking new longer and helps it stand up to the elements. Rot boards are typically made of pressure-treated wood, composite materials, or vinyl, all of which resist moisture.
Why Should You Install a Rot Board on Your Fence?
There are many reasons why adding a rot board is a great idea. The primary benefit is protecting your fence from water damage. When moisture seeps into the base of a fence, it can cause the wood to swell, crack, and eventually rot. A rot board acts as a barrier, keeping moisture away from the wood.
Another advantage is that rot boards help keep your fence looking neat and clean. They cover the base and give the fence a finished, professional appearance. Whether you’re installing a new fence or upgrading an old one, a rot board can add an extra layer of protection and curb appeal.
How to Install a Rot Board on Fence: A Step-by-Step Guide
Step One: Gather Your Materials and Tools
Before you begin, gather the necessary materials. You’ll need:
- A rot board (wood, composite, or vinyl)
- Measuring tape
- Saw (if cutting is required)
- Drill or screwdriver
- Screws or nails
- Level
- Hammer (for nails)
- Wood preservative or sealant (optional)
Step Two: Measure and Cut the Rot Board
Start by measuring the length of the area where you want to install the rot board. Cut the rot board to fit the length of your fence. If you’re working with a long fence, you may need to cut multiple sections of the rot board.
Step Three: Position the Rot Board
Next, place the rot board at the bottom of the fence. Make sure it is level and aligned correctly along the length of the fence. You can use a level to check for any tilts. A properly aligned rot board will sit evenly and provide maximum protection.
Step Four: Attach the Rot Board
Once the rot board is positioned, it’s time to attach it to the fence. Use screws or nails to fasten the rot board securely to the bottom of the fence posts. Make sure the screws or nails are placed about 6 to 8 inches apart to hold the board firmly in place.
Step Five: Apply Wood Preservative (Optional)
For extra protection, you can apply a wood preservative or sealant to the rot board. This will help it resist moisture even further and keep it in good condition for years to come.
Step Six: Check for Alignment and Stability
Finally, step back and check the rot board’s position once more. Make sure everything is straight and properly attached. If you’re happy with the installation, you’re all set!
Tips for Maximizing Protection
- Keep the rot board slightly off the ground to allow airflow. This will prevent water from pooling at the base.
- Consider using pressure-treated wood or composite materials that are resistant to rot.
- Inspect the rot board regularly for damage or wear, especially after heavy rainfall.
- Seal the rot board every few years to maintain its effectiveness.
Installing a rot board on your fence is a simple and effective way to protect it from moisture and decay. With just a few tools and some basic steps, you can increase your fence’s lifespan and keep it looking great for years. Good Neighbor Fence specializes in high-quality fence installation and protection. If you’re looking to upgrade your fence with a rot board or need assistance with installation, we’re here to help.
Get a Quote Today!
Contact us for a free quote on your next fence project. Let our experts help you with your fence installation and make sure it lasts for years to come.


